Practice a formal hand from stroke to page
The introductory broad-edged pen lesson explains how the nib edge shapes a mark. Here, Edward Johnston’s next steps show how to practice with that tool: study a model, repeat its component strokes, form whole letters, and arrange them on a ruled page. His chapters address formal handwriting; these exercises help read historical lettering and do not specify how to cut a memorial inscription.
Read the model before copying
Section titled “Read the model before copying”Johnston recommends examining a manuscript’s overall appearance, its ruling, and the proportions among page, text, margins, and ornament before copying. Then inspect the letters themselves: round or angular, upright or sloped, coupled or separate; note thick and thin stroke direction, letter height, spacing, line distance, and the way the lines are arranged. This checklist turns “copy the style” into observations that can be compared with an actual model. It is a study method, not a requirement that a modern memorial imitate manuscript lettering. (Part I, Chapter IV, printed pp. 71-72; Archive PDF pp. 75-76.)
Practice repeated strokes before full words
Section titled “Practice repeated strokes before full words”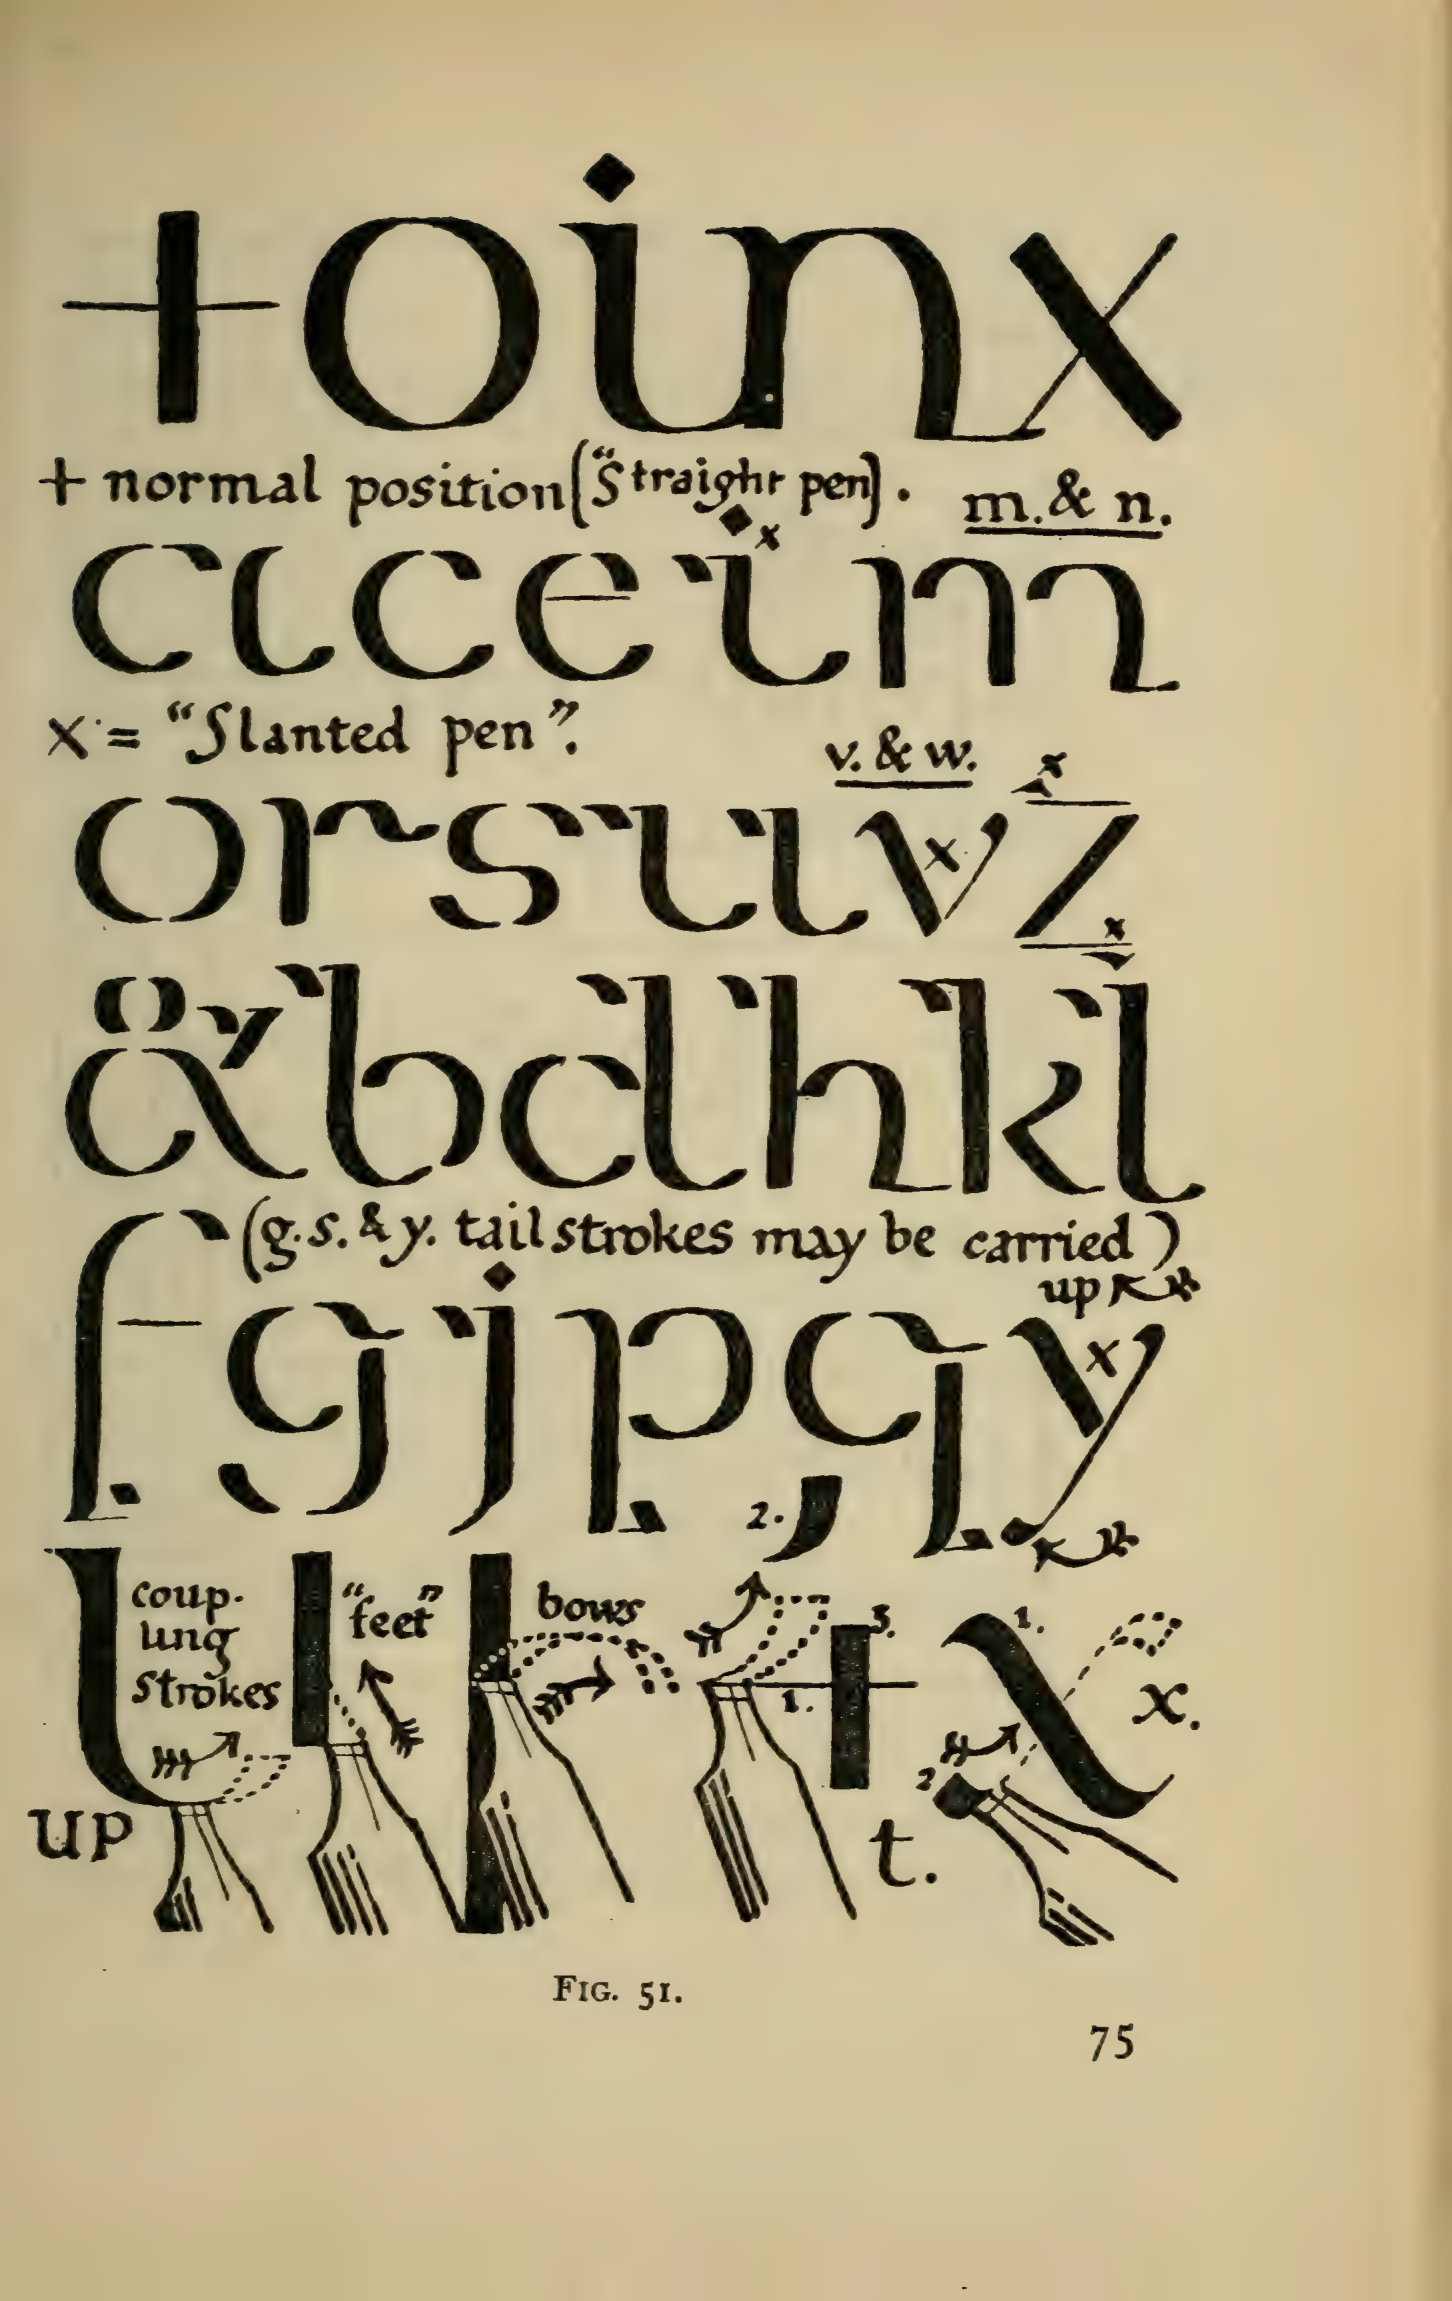
For a present-day pen exercise, use a ready-made broad-edge nib and ink labeled compatible with it. Test the flow on scrap paper and keep the nib orientation steady while repeating a short row of broad strokes, thin strokes, and simple curves. Compare the widths and endings across the row; change one variable at a time if they drift. Johnston’s diagrams document reed and quill preparation, but they are not a beginner blade tutorial. Use the equipment maker’s directions or an instructor for any tool setup that requires cutting.
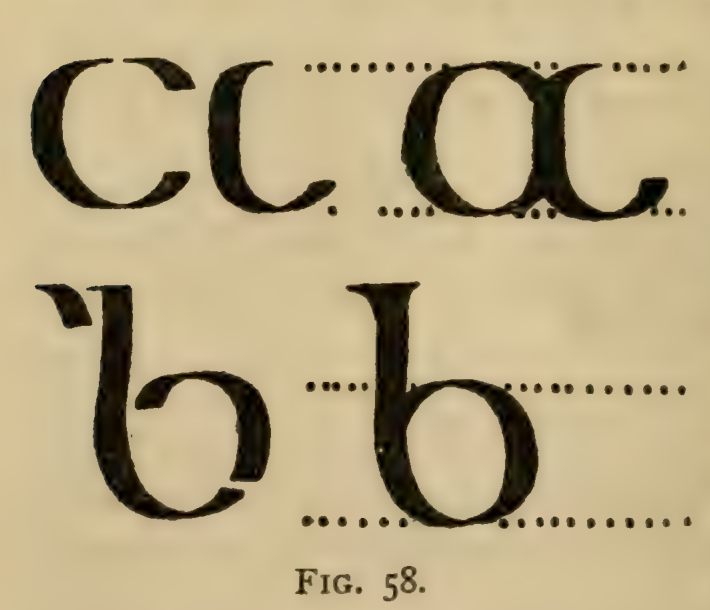
Johnston’s practice sequence then moves from component strokes to a complete letter, repeats the alphabet, and joins letters into words between ruled lines. His Fig. 58 shows enlarged forms against dotted guides as the hand moves toward a more connected style:
Join letters only when the join stays clear
Section titled “Join letters only when the join stays clear”Johnston treats a coupling stroke as a finishing stroke that can also lead into the next letter. His Fig. 52 sorts the letters in Script I by how they can join: below, above, only behind, or with no coupling stroke. He prefers a lower join when it works, and warns that an upper join can confuse the reading. For example, he says the crossbar of t should generally pass over or stop short of the next letter rather than run into it. These are observations about this historical script, not rules for every alphabet.
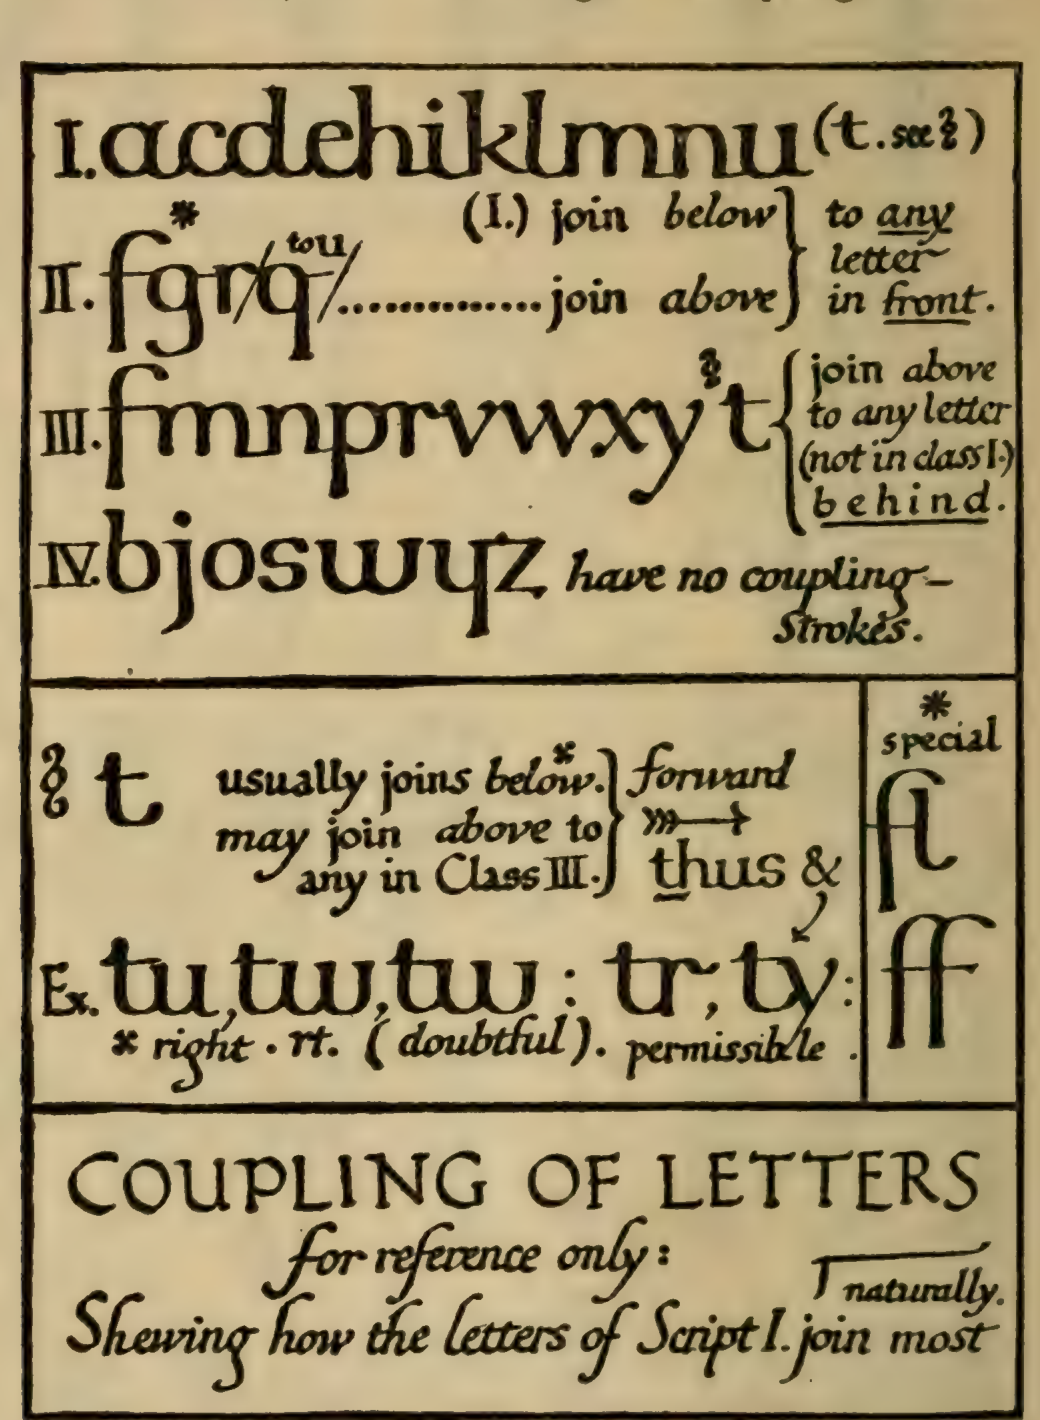
As a modern paper exercise, write a few letter pairs once separately and once with a natural joining stroke. Keep the join only if both letters remain easy to recognize; do not force every pair into one continuous line.
Arrange and rule the practice sheet
Section titled “Arrange and rule the practice sheet”Johnston recommends keeping one book for large, careful letter studies and another for smaller writing arranged on the page. Before a full exercise, test a sample line, estimate the number of lines the text needs, and decide how the margins and writing area will fit the sheet. His Fig. 65 shows a ruled example for a specific 50-word passage:
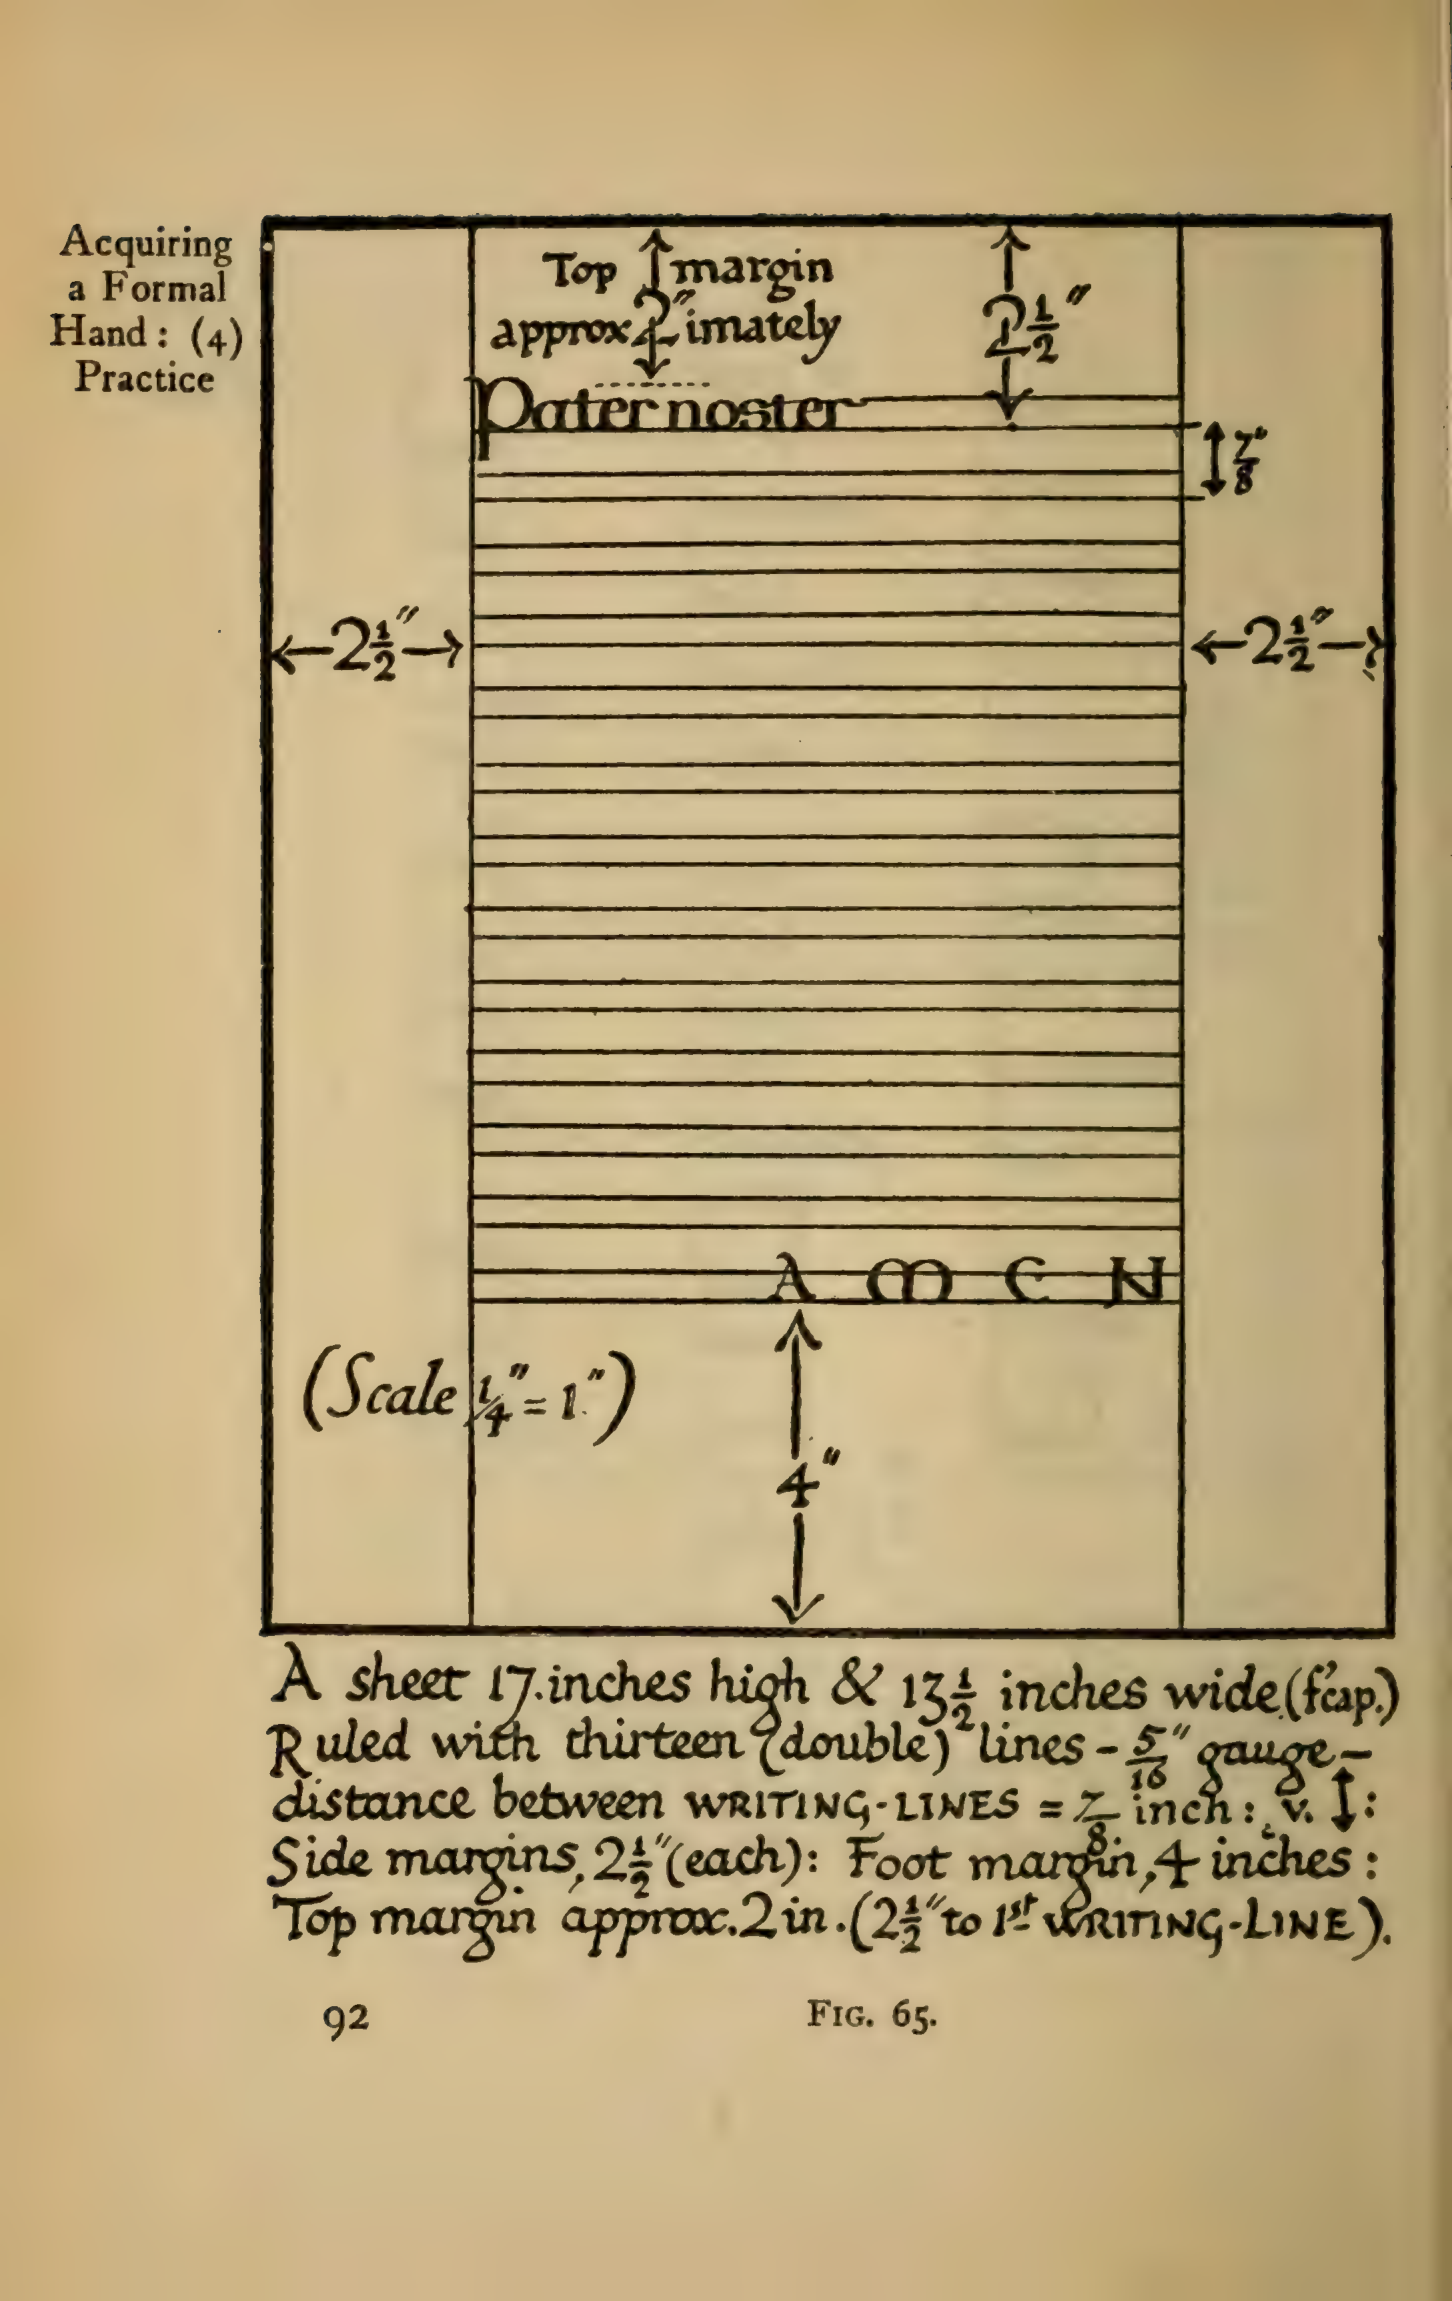
The example uses a 17-by-13.5-inch foolscap sheet, double writing lines, and planned side, top, and foot margins. Those numbers belong to its page size and assigned passage; they are not monument lettering specifications. Johnston says the ruling should be light, firm, and accurate, and describes a fine pen, hard pencil, or blunt point as period options. For modern paper practice, a printed guide sheet or a light pencil rule can serve the same study purpose. Do not carry manuscript measurements over to a stone panel.
A modern practice routine
Section titled “A modern practice routine”This is a present-day paper exercise adapted from Johnston’s sequence, not a historical shop recipe:
- Choose a clear letter model and note its main stroke directions, proportions, and spacing before writing.
- Use a ready-made broad-edge calligraphy tool with compatible ink. Repeat a few simple marks on scrap paper and check that their widths and edges stay consistent.
- Draw component strokes, then complete the same letter several times. Move to a short word only when its parts are controlled.
- Set margins and rule lines on a separate practice sheet. Write one sample line, estimate how many lines the passage needs, and adjust the practice layout before filling the page.
- Compare the large study forms with a smaller arranged version. Check the reading from a normal viewing distance and keep the letters distinct.
When practicing an actual memorial inscription, preserve the approved wording and requested line breaks. For lettering gaps see letter spacing; for full-scale monument drawings see inscription layout.
Source and image credit
Section titled “Source and image credit”Edward Johnston, Writing & Illuminating, & Lettering (London: John Hogg, 1906), Part I, Chapters IV, “Acquiring a Formal Hand: (3) Models,” and V, “Acquiring a Formal Hand: (4) Practice.” This lesson draws on printed pp. 71-77, 85-87, and 90-94 (Archive PDF pp. 75-81, 89-91, and 94-98). Figures 51-52, 58, and 65 appear at printed pp. 75-76, 86, and 92 (Archive PDF pp. 79-80, 90, and 96). The title page credits diagrams and illustrations collectively to Johnston and Noel Rooke; the four reproduced figures do not name an individual maker. The Smithsonian Libraries record for this exact Archive scan identifies it as “No Copyright - United States.” That is item-specific U.S. evidence, not a worldwide rights determination. The images are source-faithful crops from the Internet Archive scan; separate JPEGs are optimized display copies. The complete PDF remains in private review storage. See the Johnston source record and Internet Archive scan.